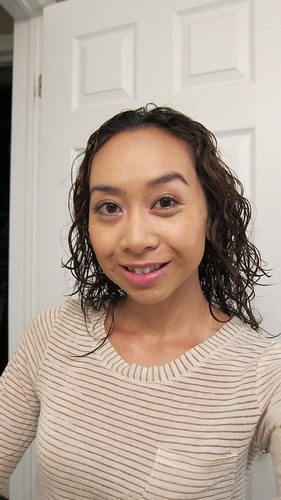
Known to notoriously post late, this is no exception 😛 I managed to snap some (terrible) shots of how I used to do my hair before I chopped it off whenever I was having a bad hair day – which I have to tell you the few weeks before I cut my hair I had a bad hair day everyday!
I was asked to show how I did my hair after I took a picture of the back of my head in this post so I’ll try my best to explain the pictures. Keep in mind that the end result never looks EXACTLY the same!
^wet hair with product in it^
I started off with wet hair and applied some product. I like to use a hair cream, something with some hold in it as my hair tends to get really frizzy. You will need to use what works best for your hair texture. In this case my hair was wet so the next step will be to blow dry but obviously if my hair is already dry I skip this step.
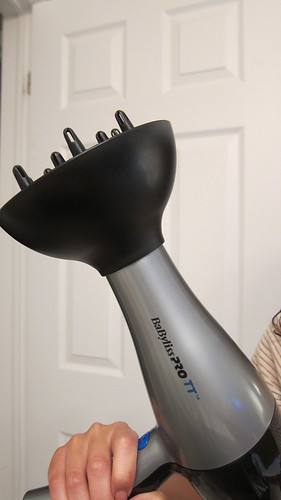
^Blow Dryer with Diffuser attachment^
If you have curly hair then you’ll know how important it is to blow dry with a diffuser attachment. When I shop for blow dryers I always make sure it comes with a diffuser for curls and a concentrator attachment for straightening.
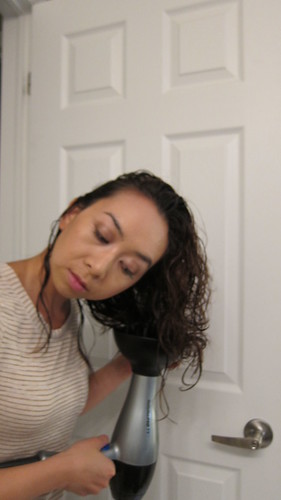
^Diffusing my hair – settings on hot and medium speed^
I know some people would say to use the warm setting on your hair dryer but I always just use the hot or it will take forever to dry my hair. Another trick with curly hair is to actually not dry it bone dry or else it will frizz. The diffusing is just to help speed up the drying so you don’t have sopping wet hair. Air drying is always best for curly hair but it’s not always practical.
^To avoid the “flat head” look I make sure to diffuse the top/back of my hair too^
Blow drying with my hair curly usually only takes a few minutes. As I said, I’m just helping to speed up the drying process. Besides I HATE the feeling of wet hair on my back!
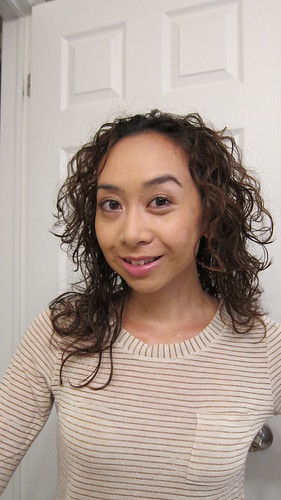
^all diffused out^
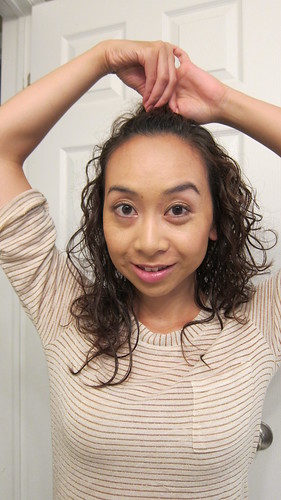
Before I had my hair cut, this is typically how my hair would look after blow drying. I had long layers in the front that used to be bangs but since it was shorter than the rest of my hair it would tend to bounce up more. So most days I would pin my bangs up which is how this up do will begin.
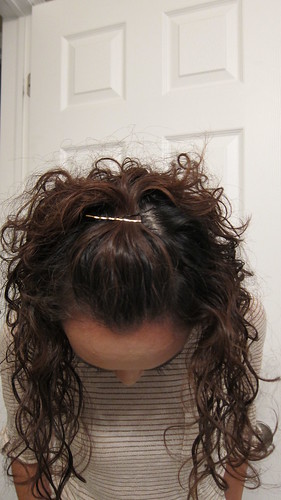
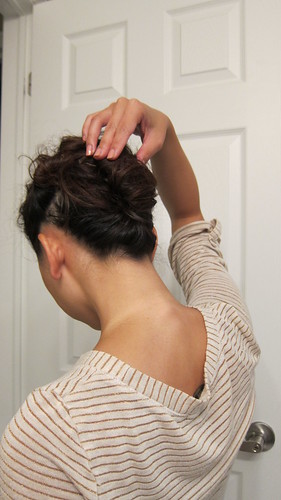
^pinning up the bangs^
I take 2 bobby pins and use them to pin my bangs up and off my face inserting them in a crisscross pattern. You can push your bangs forward for more volume if you want. Try and use bobby pins that match your hair colour, don’t do what I do LOL!
It should be noted that usually this hair do does work best when my hair is completely dry already. I find that it holds better and it just all around looks better. Remember, I have naturally curly hair. If you have stick straight or slippery hair you may have to add some texture by:
- Curling your hair first. It doesn’t have to be neat as you will be putting it all up but generally it’s easier to pin up curly hair that straight
- Making sure your hair isn’t “too” clean. “Dirty” hair has some build up which make is easier for up do’s
- Use a dry shampoo to again “dirty” up your hair.
Ok so on to the rest of the tutorial.
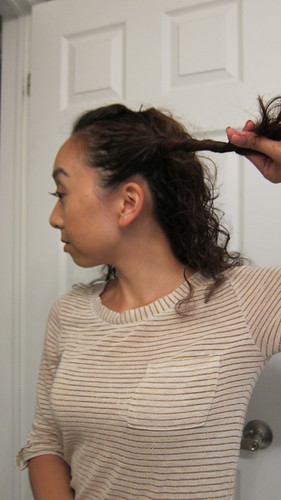
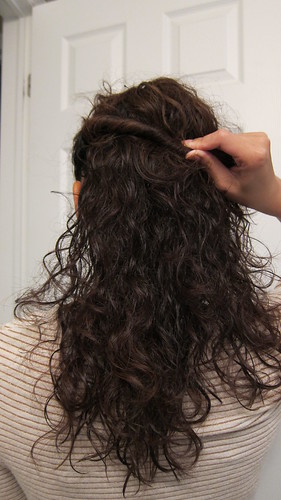
^Take the side section of your hair^
^Twist it^
^Bring the twisted section to the back of your head^
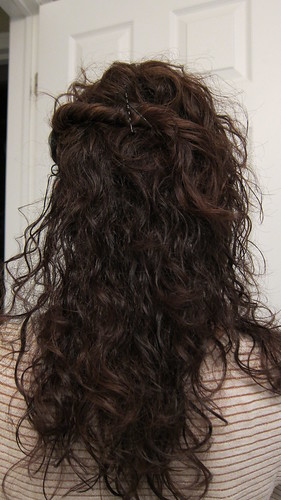
^Secure with two bobby pins, criss crossing them^
^Do the EXACT same thing to the other side^
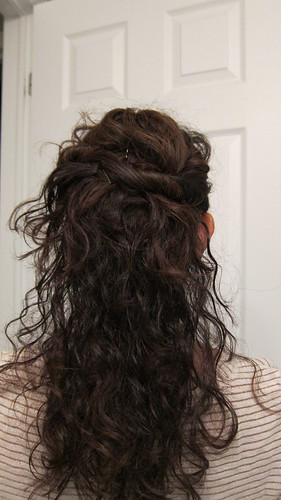
^Now take the remainder of your hair and twist up^
^Fold ends under the twist part that’s at your head^
If you have long hair you can fold the end back towards the bottom of your head and tuck it under the twist part. If your hair is shorter you can leave the ends sticking up or fold under as well – depends on the look you want.
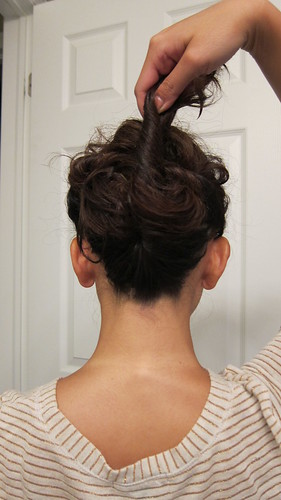
^Secure with two goody spin pins – one at the top side and one and the bottom side
(in my case the left side – it depends on which direction you twist!)^
You can also use bobby pins if you don’t have spin pins, you may just need to use more.
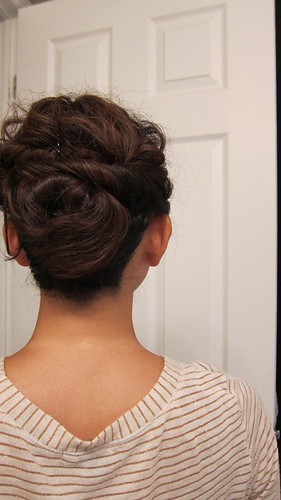
And here’s the end result. As you can see the “twist” at the back ended up looking more like a bun. Remember for me I can NEVER get the same result twice LOL!
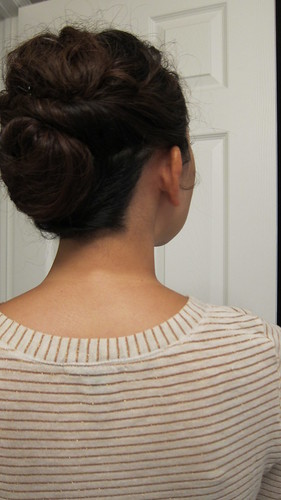
Here is how it looked in my previous post. I did do this updo at the end of the day before going out for the evening so my hair was completely dry. That may have made a difference in the look.
Voila! Nothing too fancy but this up do would make me feel put together and help keep the frizzy hair off my face 🙂
So there you have it, I don’t know if it will work for everyone’s hair type, but if you try and out and are successful please let me know!


Vicky, I definitely think it could work you may just need to add some texture to it like with curls or product. I wonder if you could do it to Jasmine’s hair!
Fantastic look, Elaine. Do you think it’ll work on straight hair?
Thanks Callandra, I did! you can see it in some of my previous posts 🙂
Why can’t you? You could totally do this!
Bessie, yes your natural waves will come out so pretty with a diffuser 🙂
Thank you Louise! I’m sure it could work for your hair too 🙂
Great tutorial Elaine!….and you chopped it all off?!! I’m dying to see!!! 🙂
Holy cow, I wish I could make my hair do that!
haha yeah I always just leave my hair down and straight. You don’t see many Asian girls with naturally curly hair…that’s unique!
As I tweeted to you…this is amazing Elaine! It looks like you had this done at a salon!!! I should learn how to use a diffuser, I have naturally wavy hair so this would be an awesome tool. Enjoy your wknd.
It IS really simple!! Trust me, I have no hair talent at all 😛 Yup, naturally curly!
Thank you Jessy! They were a battle growing up but I’ve learned to appreciate them 🙂
I’m sure it will SPG!!!
Thanks Joanna! If you try it please let me know if it worked out for you 🙂
Thanks! Even though the bun was unintentional 😛
Thank you so much!
Give it a try Kathy! You will probably need more bobby pins or you could even use the spin pins to hold up the sides.
Awww thanks Elle! You have such lovely long hair, I’m sure you could do something similar 🙂
LOL, your hair will grow back soon enough! I think mine is already growing!
Oh yes a diffuser is a must if you’re going to wear your hair curly! I know that air drying is best but I find with my hair if I air dry it my hair looks really flat on the top. I like to use a diffuser not to neccessarily add volume but just make the curls more bouncy. Also, the product in my hair doesn’t get “crunchy” like it can if I air dry it.
Great tutorial! Your hair is very pretty!
That actually looks really simple…thanks for the tutorial Elaine! Gotta try it sometime. Is your hair naturally curly?
Ahh soo cool! Your hair is so pretty : ) Love your curls
That is soooo pretty!!! I wonder if my hair will do that 🙂
This is such a chic look! I never know what to do with my long hair.. will definitely try this!
Thanks for the tutorial! I love the bun look!
thats a great idea the updo looks so elegant!
so pretty! but this would never work with my hair because of my length and the fact that i have horse hair (very thick and heavy) 🙁
Thanks for the tutorial…I wish I had curly hair because I LOVE what you did here. My hair never does what I want it to do. sigh.
Love the final look! I’ve been watching a lot of hair tutorials lately. It makes me miss my long hair! 😛
I love this post. My hair is curly and wavy at the same time and I get bored with it. This up do I will surely try!
I love love love the updo! and do you find a diffuser really works? I have curly hair too but you would never know it because I straighen my hair every day!
Is there a hair dryer you would recommend with a diffuser attachment?
This looks pretty, Elaine and the best part is that it seems easier to do than the way it looks. I always use a giant hair clip and call it a day. Will give this a try.
Thanks Annie! I think it *could* work but you’d probably have to put some texture into it. Maybe do it after not washing your hair and add a few messy curls here and there to help it hold! Those goody spin pins might be easier to work with than bobby pins too. They have smaller ones for thin hair as well!
So pretty Elaine! Thanks for the tutorial! Do you think it will work with thin and straight hair? I have a feeling my hair won’t hold up but I sure as heck will try this!! 😀