
What is strobing? Many of you have likely heard of this makeup technique, probably because of Instagram makeup accounts…at least that’s how I first heard about it. Strobing is a great effect that can be used to make your skin look luminescent, glowing from within. In simplest terms, it’s exaggerated highlighting. You may have been strobing this whole time and not even know it! I like to strobe in the spring and summer, since that’s when my face would have more of a natural sunkissed glow anyway; I tend to focus more on contouring in the colder months. If you’re not familiar with this technique I’ll break down the 6 easy steps to strobing.
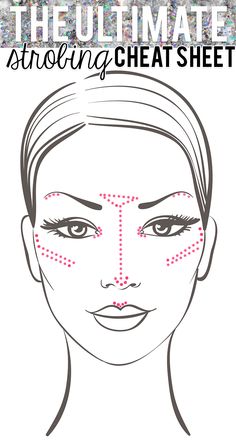
{6 Easy Steps to Strobing}
The above diagram shows where you want to apply your highlighter when you’re strobing.
Steps To Strobing 1: Apply to the cheekbones
Add highlighter above your cheekbone in a “C” shape. This diagram makes it look like more of a straight line than what I would do, but everyone’s a bit different with their application technique. It’s also a good idea to take note of your own face shape.
Steps To Strobing 2: Apply to the eye area
With a light hand add highlighter below the brow bone and also in the inner corners of your eyes. This opens up the eye area making your eyes look bigger and brighter. This is also the key to looking more awake even when you’ve had a tiring day!
Steps To Strobing 3: Apply to the cupid’s bow
The cupid’s bow is the dip at the curve of your upper lip. This is an area I NEVER forget to apply highlighter to. It bounces light beautifully and makes your lips stand out in a crowd. Your lips will appear fuller with minimal effort!
Steps To Strobing 4 and 5: Apply to forehead and nose
The remaining spots to highlight are the middle of the forehead (the anatomy nerd in me wants to refer to it as the glabella) and down the bridge of the nose. Here’s a tip: If you have combination skin like me, the forehead will get shiny throughout the day anyway. Therefore, I omit this step in my strobing technique. If you have drier skin, or never get shiny then don’t leave this step out!
Steps To Strobing 6: Blend, blend, blend
This step is self-explanatory. Once you’ve placed your highlighting where you want it, be sure to blend well to ensure a natural look!
Products for the perfect strobe look
There are a lot of products you can use to achieve this look. Here are some of my favourite options.
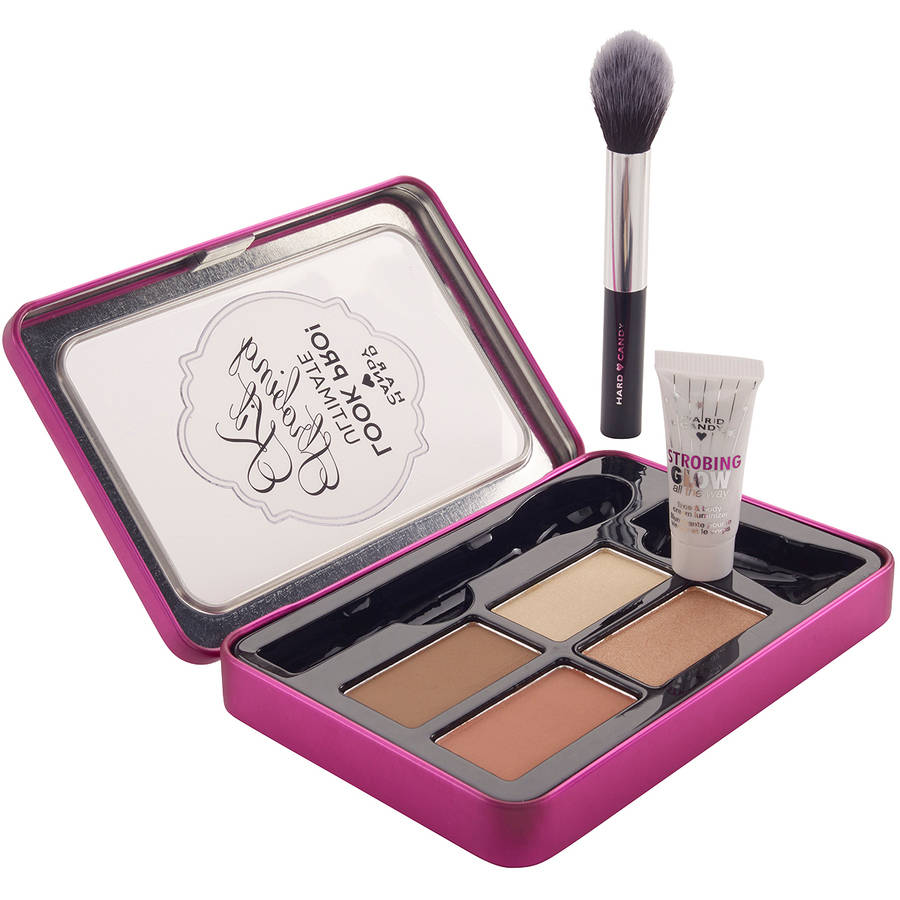
Hard Candy Look Pro! Ultimate Strobing Kit: This kit makes the concept of strobing child’s play. Each part of the palette is labelled for your convenience, so you can follow the step-by-step instructions to make your skin glow. It includes a bronzer and matte blush. Comes in Light to Medium and Medium to Deep.
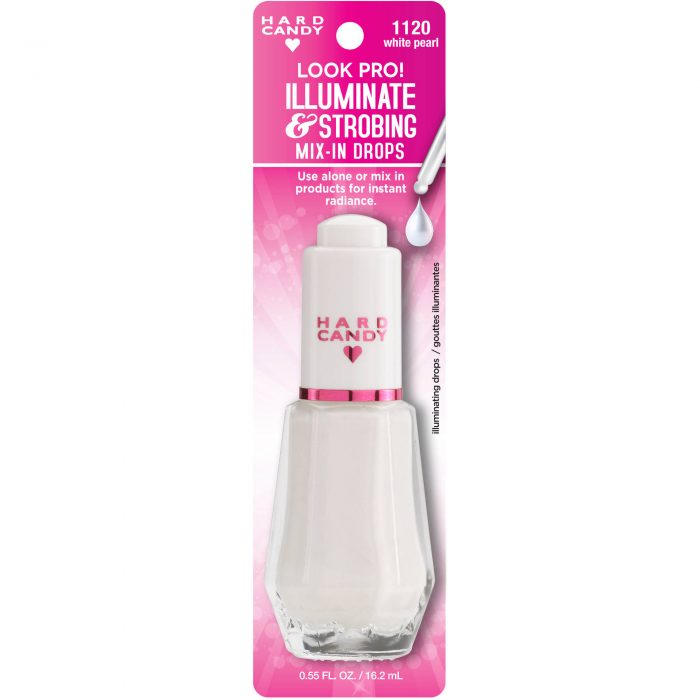
Hard Candy Illuminate & Strobing Mix-in Drops: Put a few drops of this into your moisturizer or foundation to get overall illumination. Put a few strategically-placed drops on your face based on the above diagram and you’re strobing!
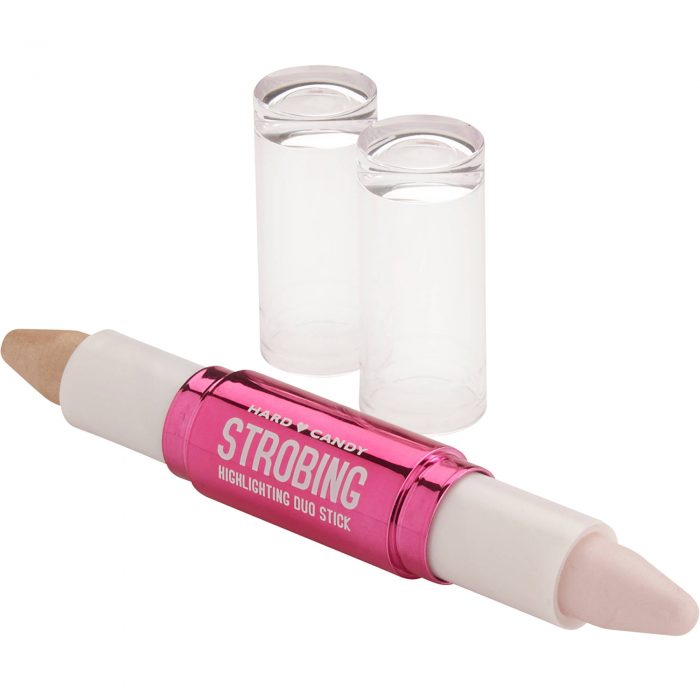
Hard Candy Look Pro! Illuminate & Strobing Face Duo Stick: This cream-based highlighter has two shades – one has a pink undertone and one is more white. You can use one over the other or if you have pink undertones, blend both to get a tone that looks more natural. It’s a quick and easy way to get that lit-from-within look on the go!
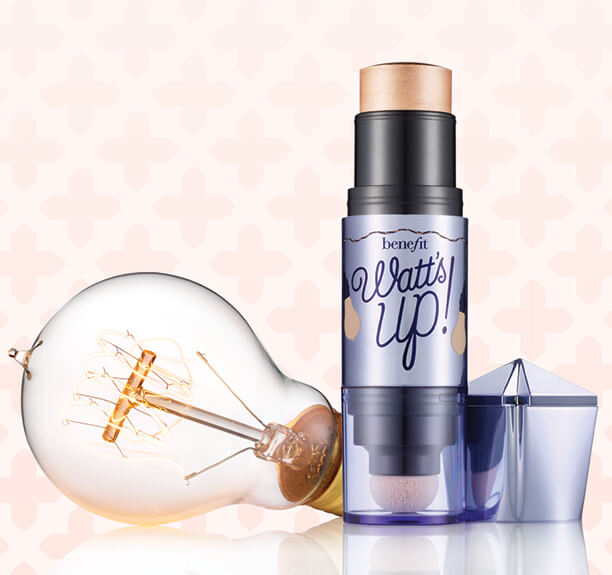
Benefit Watt’s Up: This creamy highlighter is a nice champagne tone that works well with darker skin tones. Apply and blend away with your finger for the best effect. I think I use this one the most out of all of the highlighters in my collection.
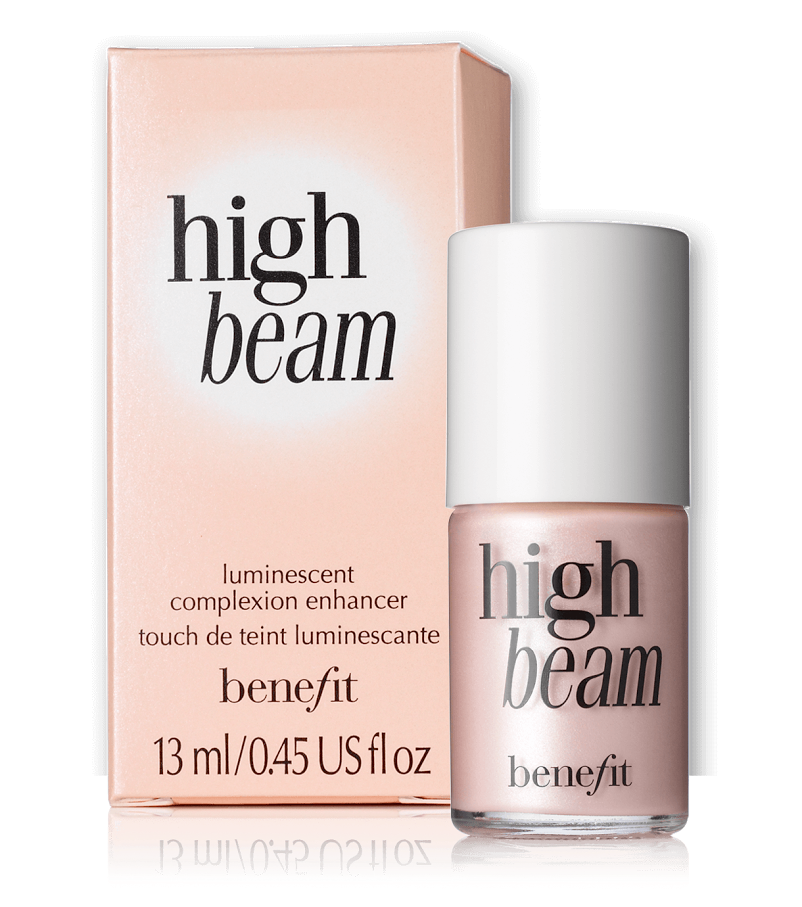
Benefit High Beam: This is a liquid highlighter that is a bit whiter/brighter than some other highlighters out there. If you have fair skin, this is a great option. It dries quickly, so blend fast!
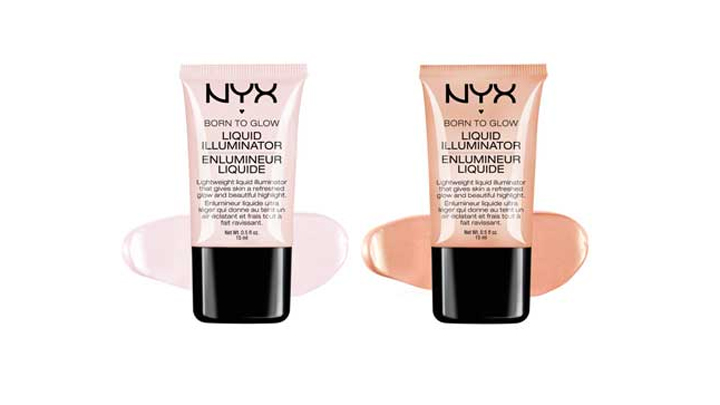
NYX Born to Glow Liquid Illuminator: As the name suggests, this is a liquid that you apply on top of your foundation where the sun would naturally kiss your face. It’s a quick and easy way to add some glow to your look.
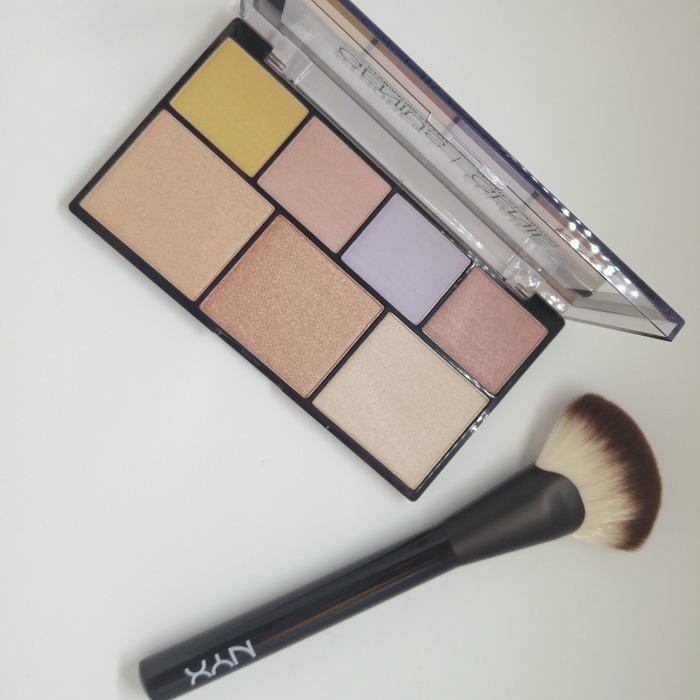
NYX Strobe of Genius Palette: NYX previously had a highlight and contour palette that did quite well, but people were hoping for more pigmentation in future iterations. Well, here it is! This palette contains 7 shades of highlighter to suite every (and I mean every) skin tone – there’s even a pale lavender in there for the really pale skin out there! The colour payoff is REALLY strong, so I urge caution with this one. A little goes a long way, but it looks FABULOUS.
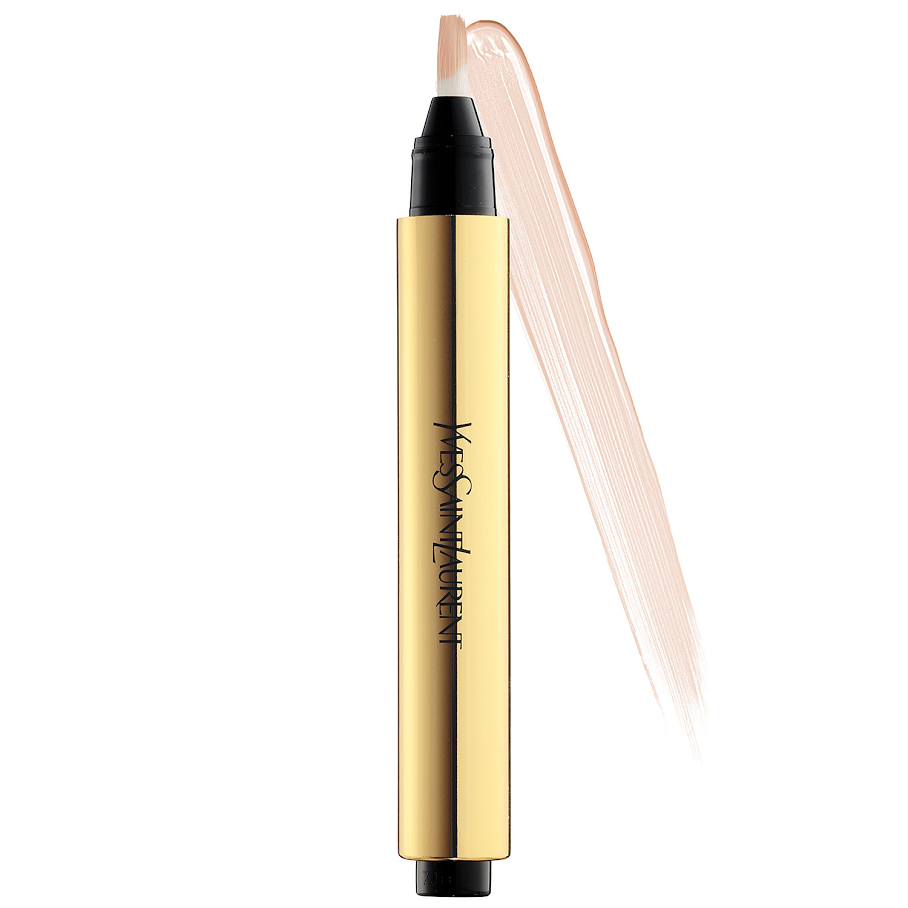
Yves Saint Laurent Touche Eclat: This is likely the most famous highlighter on this list. It’s a bit steeper in price than some of the other options here, but it clearly pays for itself. It has a precision applicator, so you can be as subtle or as bold as you like.
Love this post and I love the cheat sheet. Thanks for sharing various options 🙂
Isn’t it great that there’s something for everyone? 🙂
I love your strobing cheat sheet and your selection of makeup for acheiving the strobing look!! 🙂
Ursula
http://www.blueridgebeautyblogger.com
I feel like I have so many of these products but still don’t ever strobe. I am glad you’ve broken it down for me.
I do love the highbeam and watts up by benefit and the hard candy strobing stick.
I have a variety of highlighting products (never saw those cool ones from Hard Candy before!), but I’m often too lazy to do it. I think you’re right about doing it more often in the winter. Hopefully, I’ll be inspired!
I can get pretty lazy about it, too, so you’re not alone! 🙂
I LOVE benefit’s high beam – I completely forgot about it til you mentioned it here in your post. I used to own it but it got weird after a few years (as it would lol). Anything creamy + or gives a dewy effect is amazing in my mind!
I hear ya! I love the creamy/dewy look for highlighting or strobing. It can be a fine balance, though, since I have combination/oily skin and don’t want to look greasy 🙂
I like that you included high end products and drugstore. It gives great options! The NYX palette looks amazing but I don’t know if I could spend the money on it.
http://www.thinkingofmakeup.com
The NYX palette is actually pretty inexpensive compared to some of the higher end palettes you could find at Sephora. It’s about $20 for all 7 colours while a trio from Hourglass is over $60! Even Watt’s Up (my current fave) is about $30 for a full-sized version.